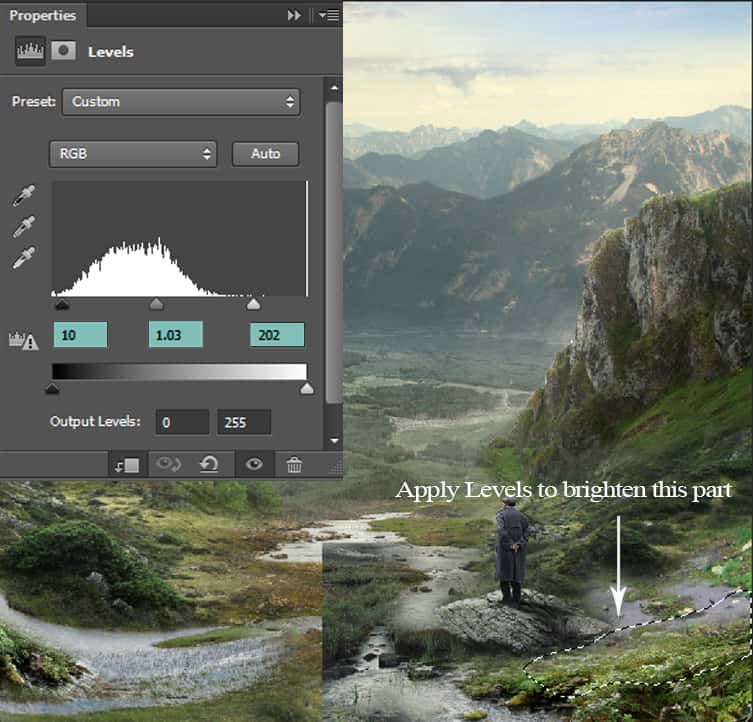
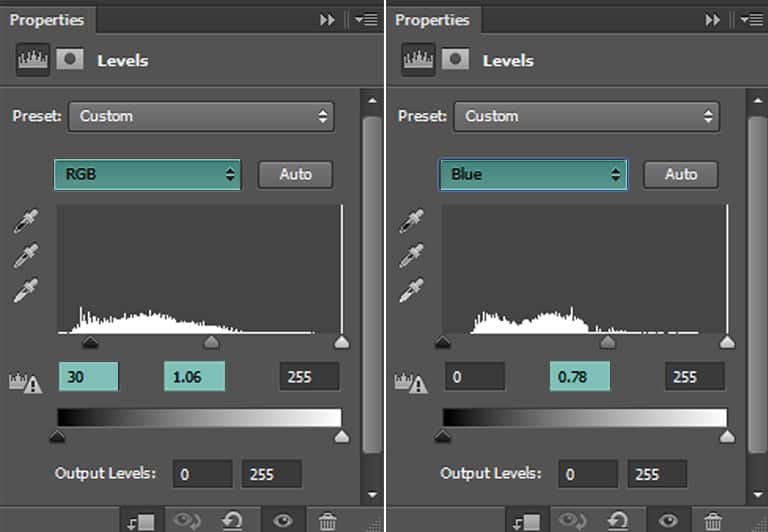
Create Levels once again to brighten some part of the brook. Fill it’s layer mask with black, then taking a soft brush as we did in the previous step reveal back the effect with white as the foreground color.
Then apply a Vibrance adjustment and decrease the Vibrance value to -34:


Step 32
Open Waterfall 1 stock. I only take the part of waterfall flow.
Move it onto the left peak after scaling it down, then using a layer mask hide away the hard edges with a soft brush.
Create a Levels layer in clipping mask to make it seem blended and also to add a bit of contrast:


Step 33
I used Levels adjustment layer with Clipping Mask to make color and brightness of waterfall fit the rest.

Step 34
Open waterfall 2 stock and only take the waterfall flow part.
Drag it onto your main document above the waterfall 1 layer and scale down it’s size
(Edit > Free Transform Tool).
Using layer mask, mask away the hard edges and some unwanted parts as well.
With the Warp transform tool, tweak it to change the direction of the water flowing down:


Step 35
I used a Levels adjustment layer with Clipping Mask to make color and brightness of waterfall fit the rest.

Step 36
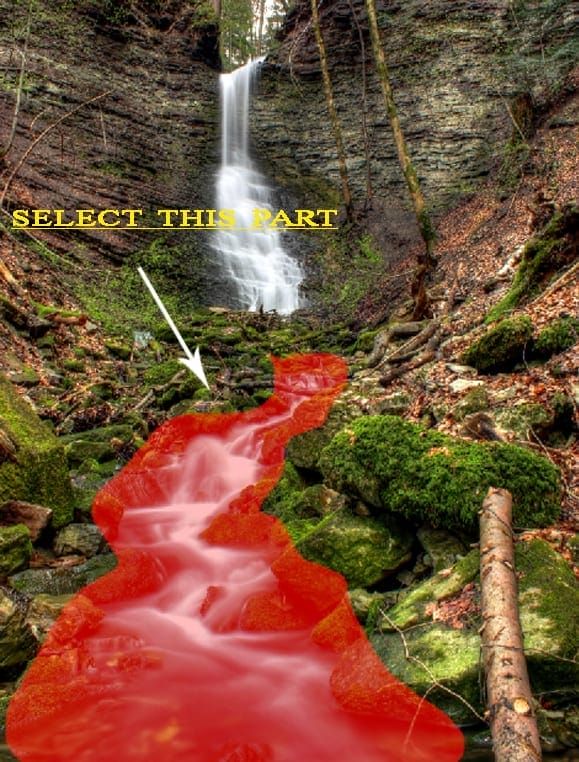
Open waterfall 3 stock and select the lower part of the waterfall flowing.
Scale its size as needed and then place it like this:
With the layer mask, remove the unwanted parts with a soft brush of opacity -37% and flow -64%.
Reduce the waterfall layer’s opacity to 66%.


Step 37
Since the water is very bright, create a Hue/Saturation layer (in clipping mask) and decrease the Saturation to -98:
Add some contrast by applying a Curves adjustment, again in clipping mask:
Apply a Brightness layer and reduce the brightness to -72:


Step 38
Open the 4th waterfall stock and select the part shown in the selection. Drag it onto our main document and reduce its size (Cmd/Ctrl+T) and flip horizontally (Edit > Free Transform > Flip Horizontal).
When we have the desired position and the transform tool is still activated, right click again to show up the transforming option box. This time, choose Warp. Now try to alter the shape of the rock by warping it.
17 responses to “Create a Surreal and Magical Dream Bottle Landscape”
-
I have to say, this may be long but it is the most complete tutorial I have ever seen and I have been looking at tutorials for 20 years. Thank you for the assets, your time and your expertise. It’s wonderful. Don’t worry about people with short attention spans! XOX
-
I try but as a French speaker, it is realy hard and I couldn’t find some translation…
Thanks anyway.
Regards.
Françoise Labio -
really long, really tireing, but good tutorial, but its really really long
-
Really love it but i think a video Tut is better :D
-
its very long please make it short :(
-
Awesome tutorial. I always wonder how much patience these guys have to write such a long and detailed article.
-
It means that the .exe file is missing. Sometimes it happens because you have had a previous version of it and accidentally deleted it. But maybe you are installing it from a CD-ROM and it doesn’t have the file or it is located in another folder. Try to open the folder ahead i.e.: C:users-AppDataLocalAdobeOOBEPDAppDECore and see if there is any exe file. Another reason could be the path’s name.
-
???
-
Cool post this is really good
-
Hell yeah!
-
Yeah!:D
-
wonderful
-
Awesome tutorial. I like the way these tutorials explain the things… specially the screenshots.
-
Thank you for sharing this I have learned a lot and will use some of it in my own compositions.
-
Osm
-
yep:)
-
-
Excelente


Leave a Reply