We’re almost there! We just need to add the root shadows and then we’ll enter the final stage of our manipulation.
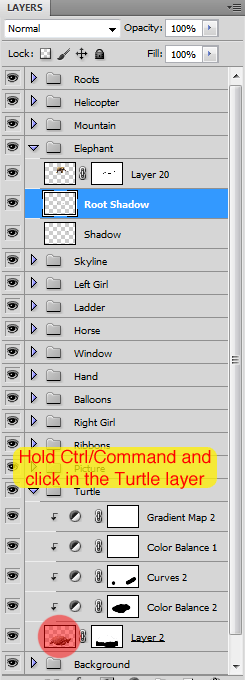
So go to our elephant group and add a new layer above the Shadow layer we created on the step 17. Name the new layer ‘Root Shadow’.

Open the turtle group again and Ctrl/Command click the thumbnail of the turtle.

Now paint the shadow of the roots with a hard brush.

Then add a Gaussian blur to make the shadow more realistic, go to Filter > Blur > Gaussian Blur and set the Radius to around 10px.


Set the opacity of this shadow layer to around 40%.

And now we’re finally done with all those stock images and we’re ready to make the final adjustments.

Step 24:Final Adjustments
To start with out final adjustments, create a new layer on the top of our layer stack.

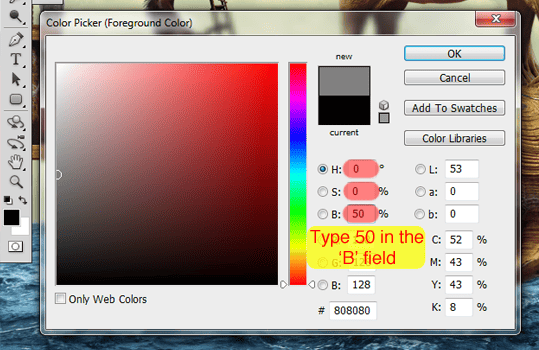
Now select a gray color by going to the color picker and setting ‘H’ to 0, ‘S’ to 0 and ‘B’ to 50.

Fill the new layer with gray using a shortcut. Alt/Option+Delete will fill the layer with gray for you.

Now change the blend mode of this layer to Overlay and you will se no difference in your image.

Select the Dodge Tool(O) with a soft brush(hardness between 0~50%) and the exposure at 10%

And now start “painting” your gray layer with the Dodge and the Burn Tool. Here are some tips:
- Doge Tool will make place you paint brighter
- The Burn Tool will make the place you paint darker
- To quickly change between them hold Alt/Option, this will change the tools as long as you hold the Alt/Option key (You will use this A LOT)
- If you made a mistake and it’s too late to undo the changes don’t worry, just select the Brush Tool and paint the area of the layer you want to “reset” with gray again (that’s why we’re using this gray layer)
This is the most important step of our manipulation, and can really improve your final image if you do this right. So take your time in this step and don’t rush with the painting.
In the image below I tried to show you which areas to dodge and which areas to burn but it’s just a reference, try to make your own lightning of this image.

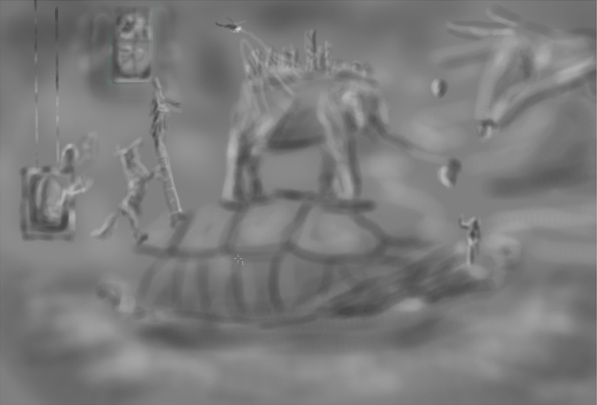
The image below is just my gray layer after I was done with the Dodge/Burn Tool painting. You don’t have to do that, but if you want to see what yours look like just change the Blend Mode to Normal again.

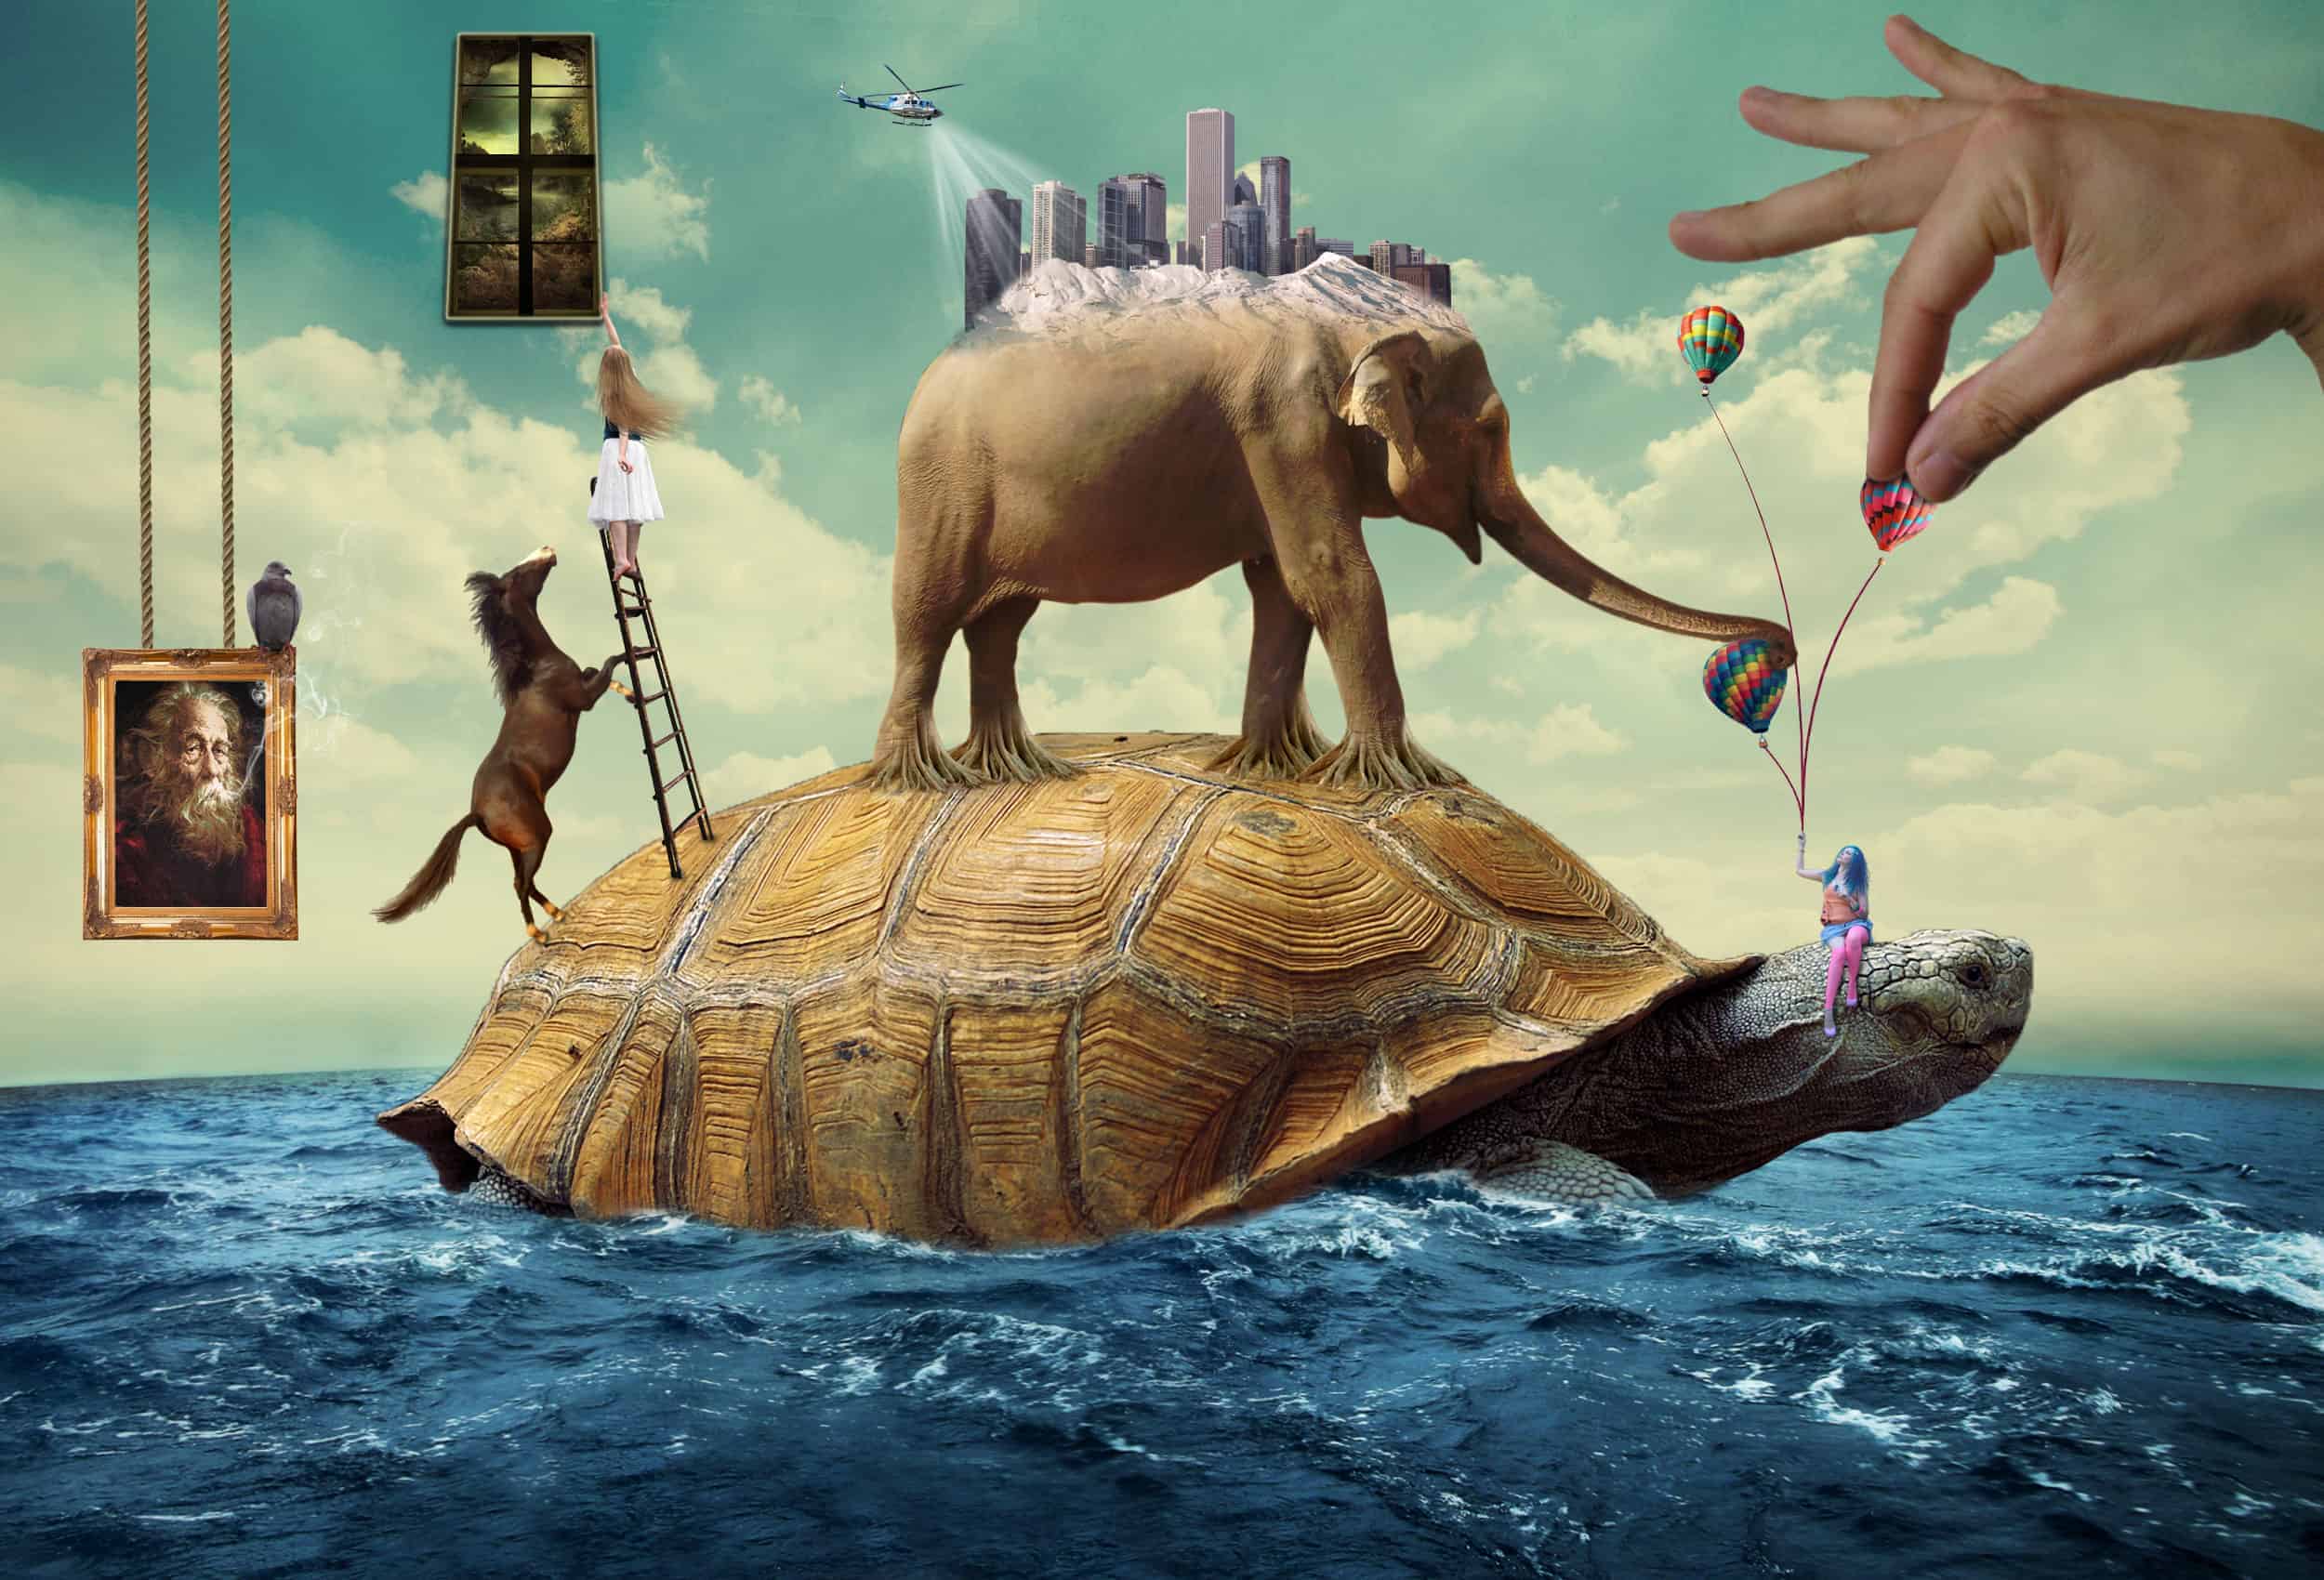
And here is my outcome:

We’re almost finished. Press Ctrl/Command + Shift + Alt/Option + E to make a new layer merging all the layers of your project together. Don’t worry, your layers will not be deleted.
Now change the blend mode of this new layer to Lighten and lower the opacity to around 35%.
32 responses to “How to Create a Surreal Scene Full of Life in Photoshop”
-
oh,I know it.
-
I like it very much.But how can i entire to see it.
-
thank! so much for that creation
-
Such a beautiful artwork!!
-
great tutorial thank you
-
this tutorial was awesome thanks
-
Really great tutorial. Very well explained step by step.
-
You’ve made a very nice and comprehensive collection of WordPress Themes. I appreciate it. Really great art work with typography. Thanks for sharing this nice post.
-
You’ve made a very nice and comprehensive collection of WordPress Themes. I appreciate it.
-
Outstanding tutorial!Clear instructions and awesome picture instructions. Very nice, thank you a bunch.
-
Beautiful image. Congratulations to the technical and thanks for the tutorial:)
-
Loved it!! Thankyou, I learnt such a lot :)
-
thanks! learn a lot of useful shortcut and tips here
-
I cant get my roots and elephants feet to lok right i need help
-
this looks awesome and easy
-
Thanks very much for this easy to follow tutorial!!
http://mrbloop.deviantart.com/art/Surreal-scene-full-of-life-346099572?q=gallery%3Amrbloop&qo=0
-
when I go to the exposure everything turns black. What do I do?
-
its -0.25 not -25. i did the same thing
-
-
I can not thank you enough, the amount of things I’ve learnt in two hours is incredible, would usually take me a week of watching and reading tutorials, but nope, you’ve used many techniques that made my life easier! Thank you is not enough!
-
Great tutorial!But the mountain photo is missing :/Some extra help…
-
just do what i did ,
download the attached PSD from up there and take the mountain photo from there :D -
@SalahKabbani Thank you for your response :)But how can I take it from the mountain layer
-
@SalahKabbani OK! Got it!I decided to replace the mountain photo with a desert one ^_^Thanks anyway :)
-
awsome tut
Thank you so much for this tutorial really great photo and great explanation love it.
but i have a problem with the mountain photo , the link of this photo doesn’t work , can you please upload it again or give me another photo that could be good for the tutorial ?
thanks
-
Never mind i took it from the downloadable project :)
I like it.
Thank you for your awesome tutorial.
Very nice Job!
Thanks a lot dear ^^.
Hi Guilherme, From the start of your tutorial you say to go to lens correction and distort the image to + 25,00, it distorts the image considerably !, is that right, ?, by the way it is a great tutorial,
regards and respect johnny
-
Its ok, all i did was after the lens correction was used the free transform tool and adjusted the image to cover my canvas again lol, My bad..
Can I use CS3 for this creative tutorail.
Can I use CS3 for this creative tutorail.


Leave a Reply